Our Process
Every wooly wonder we produce is designed and made by hand in my studio in Durham, North Carolina. While there are some best sellers in my line that I have been making for a while, I design a new line for both Miss Fitt and Moss Fete every year that gets put into production for my in-person shows. I also design both one of a kind items and custom pieces for clients throughout the year. Typically, if you are ordering on the website, the item is made just for you as we rarely have everything from the line in stock.
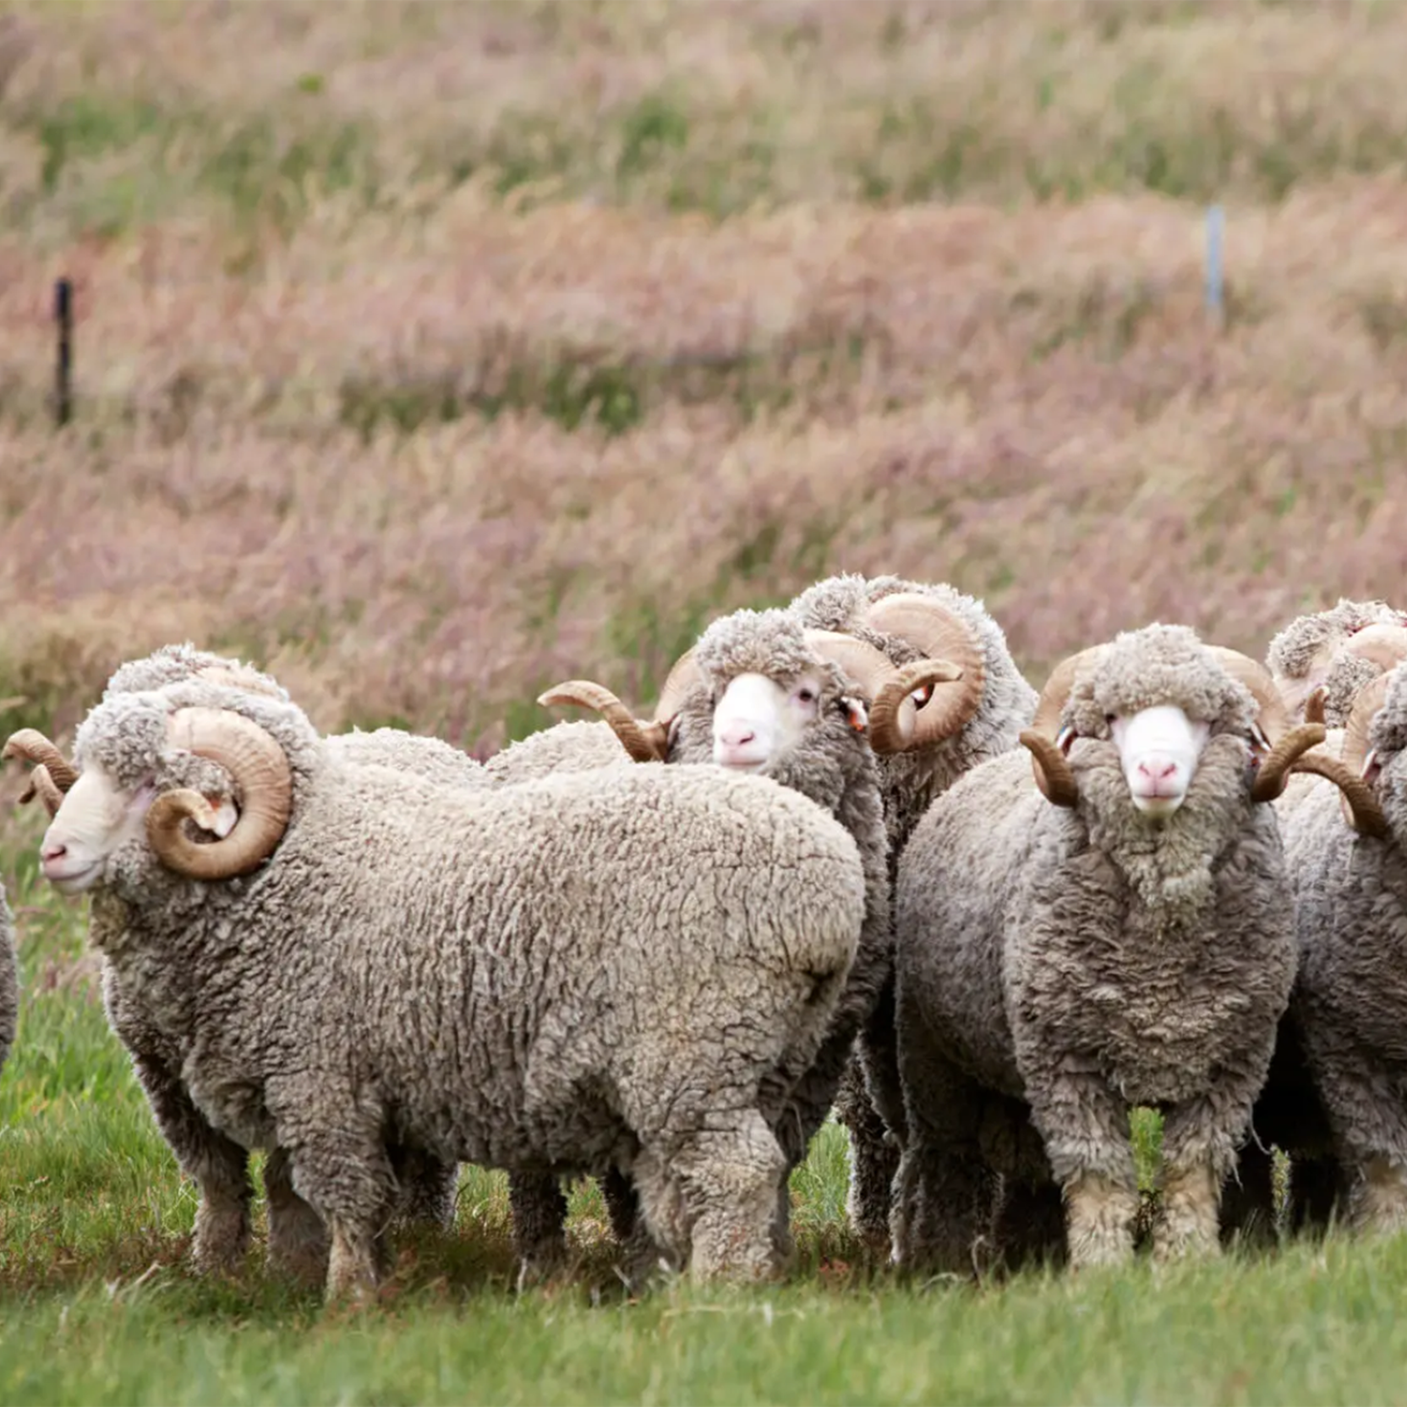
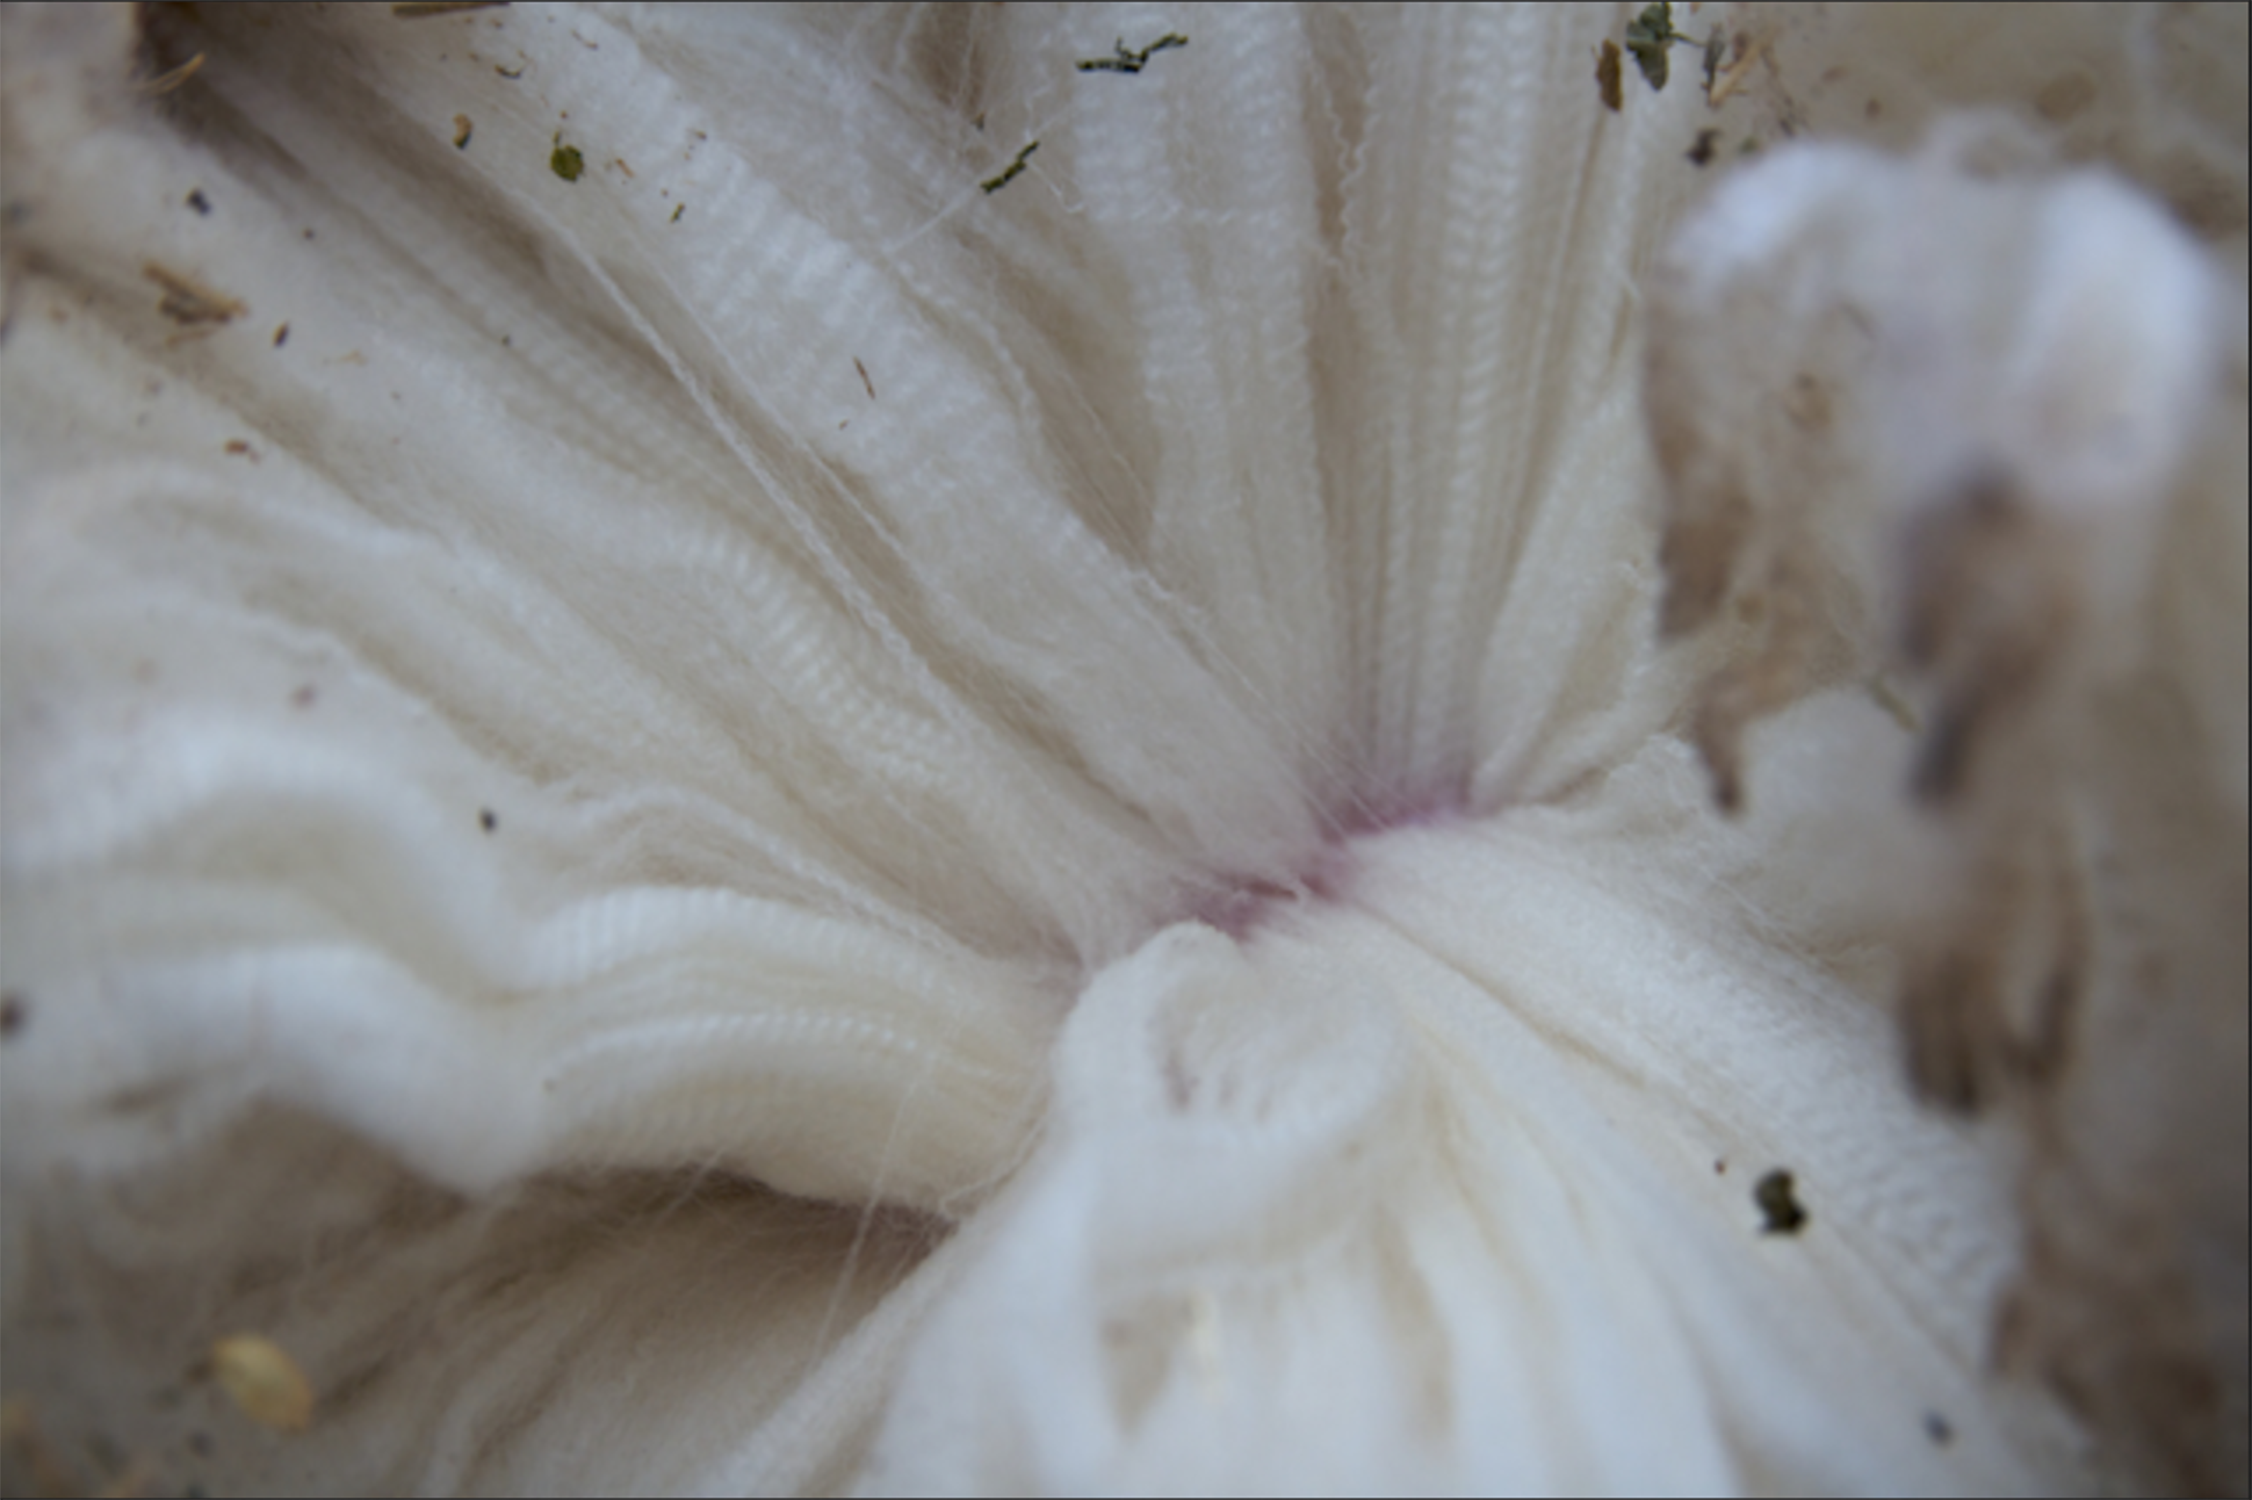
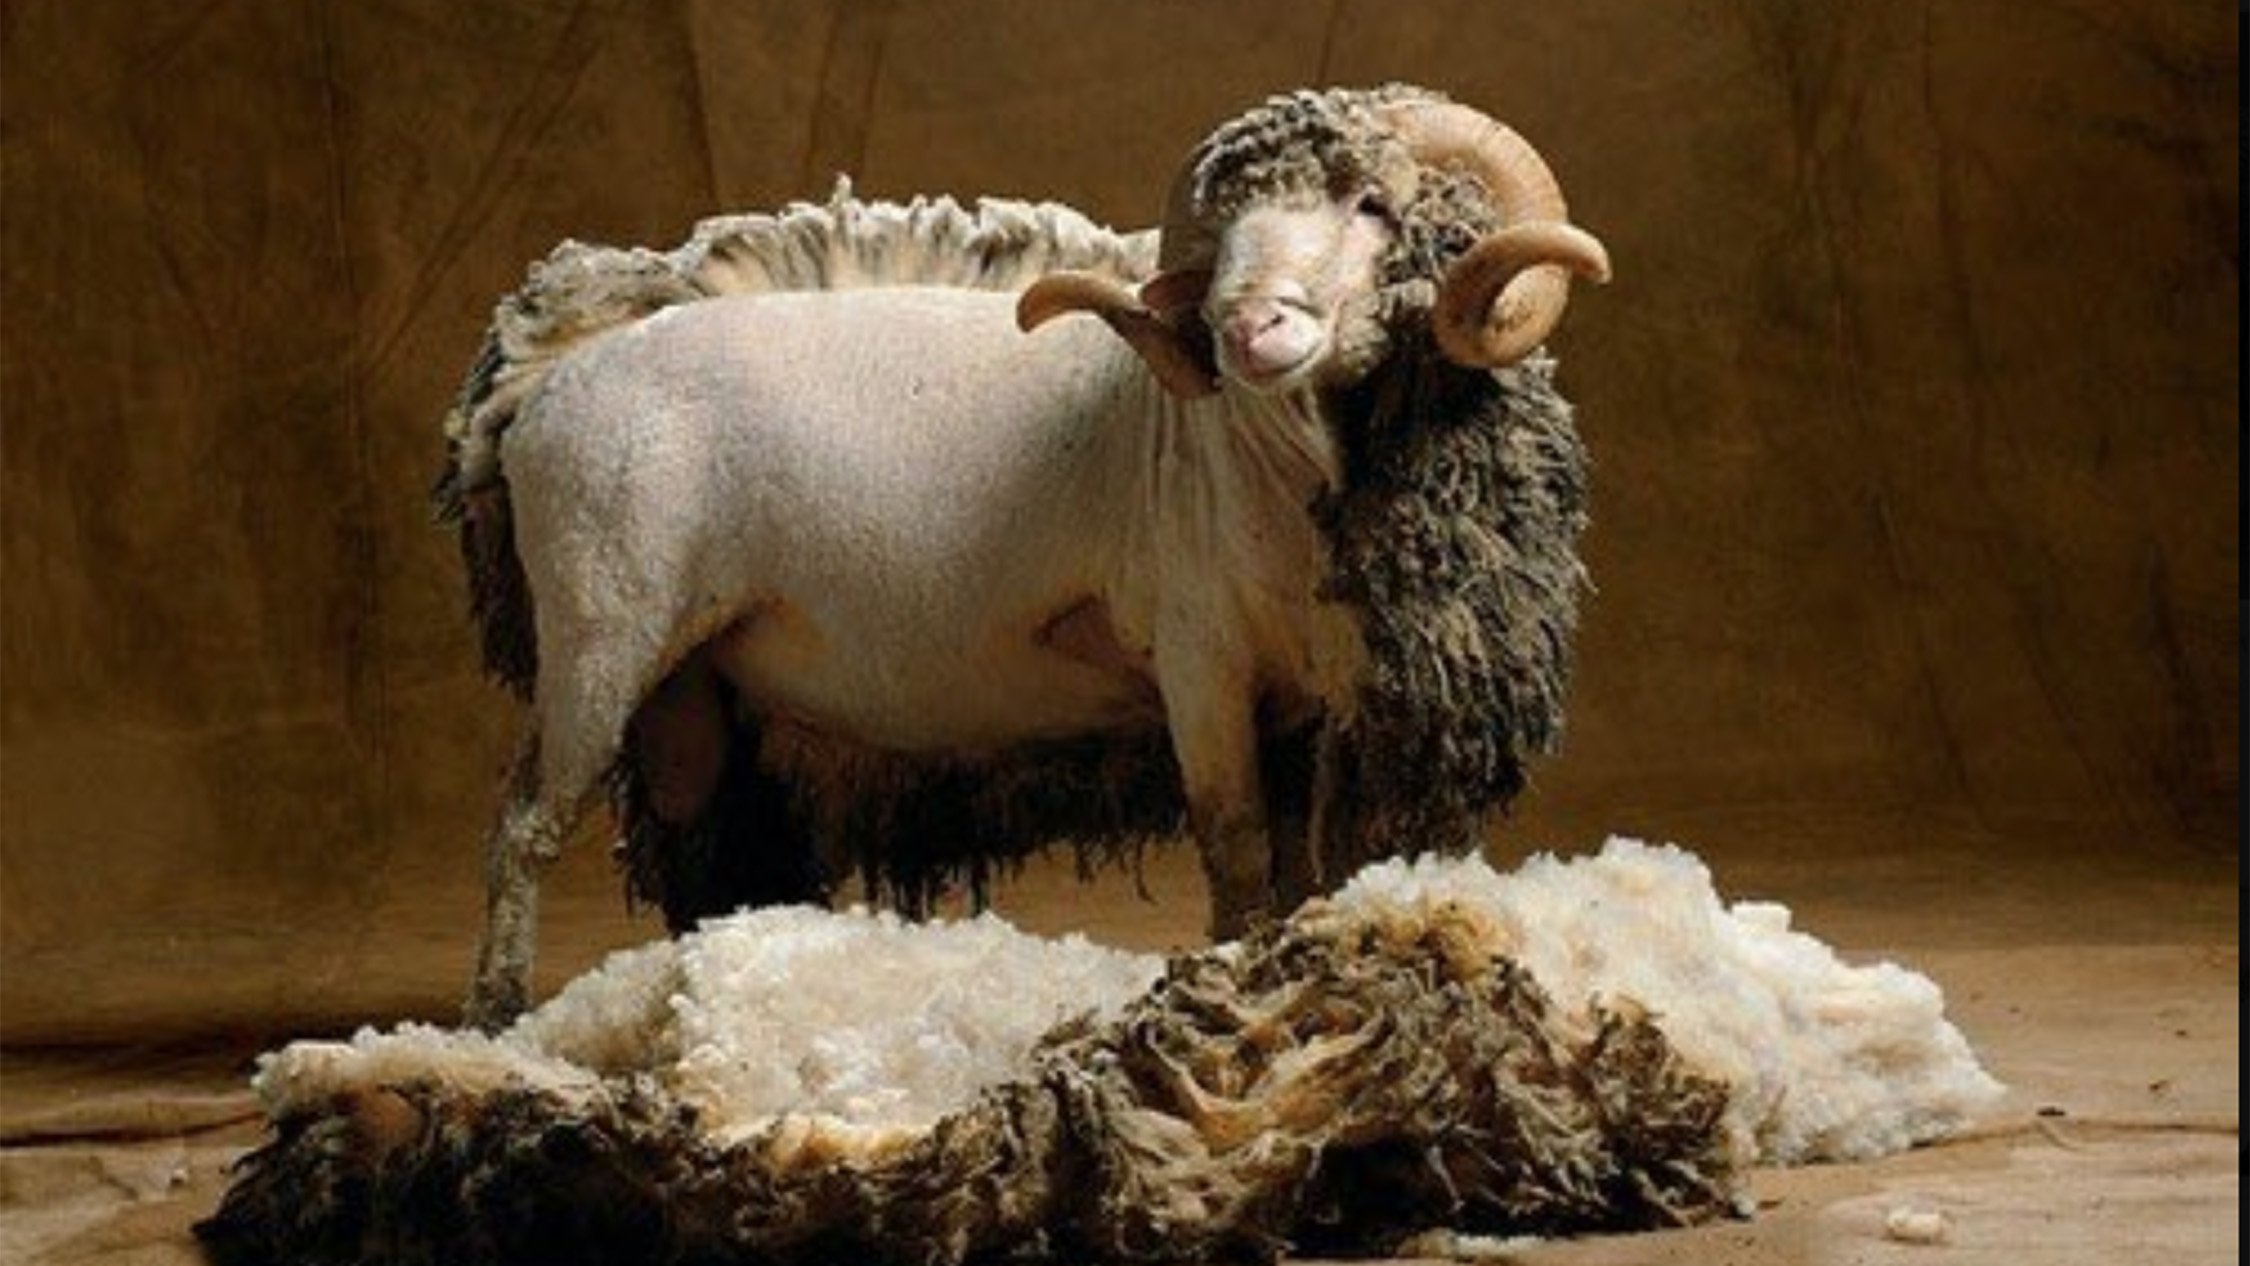
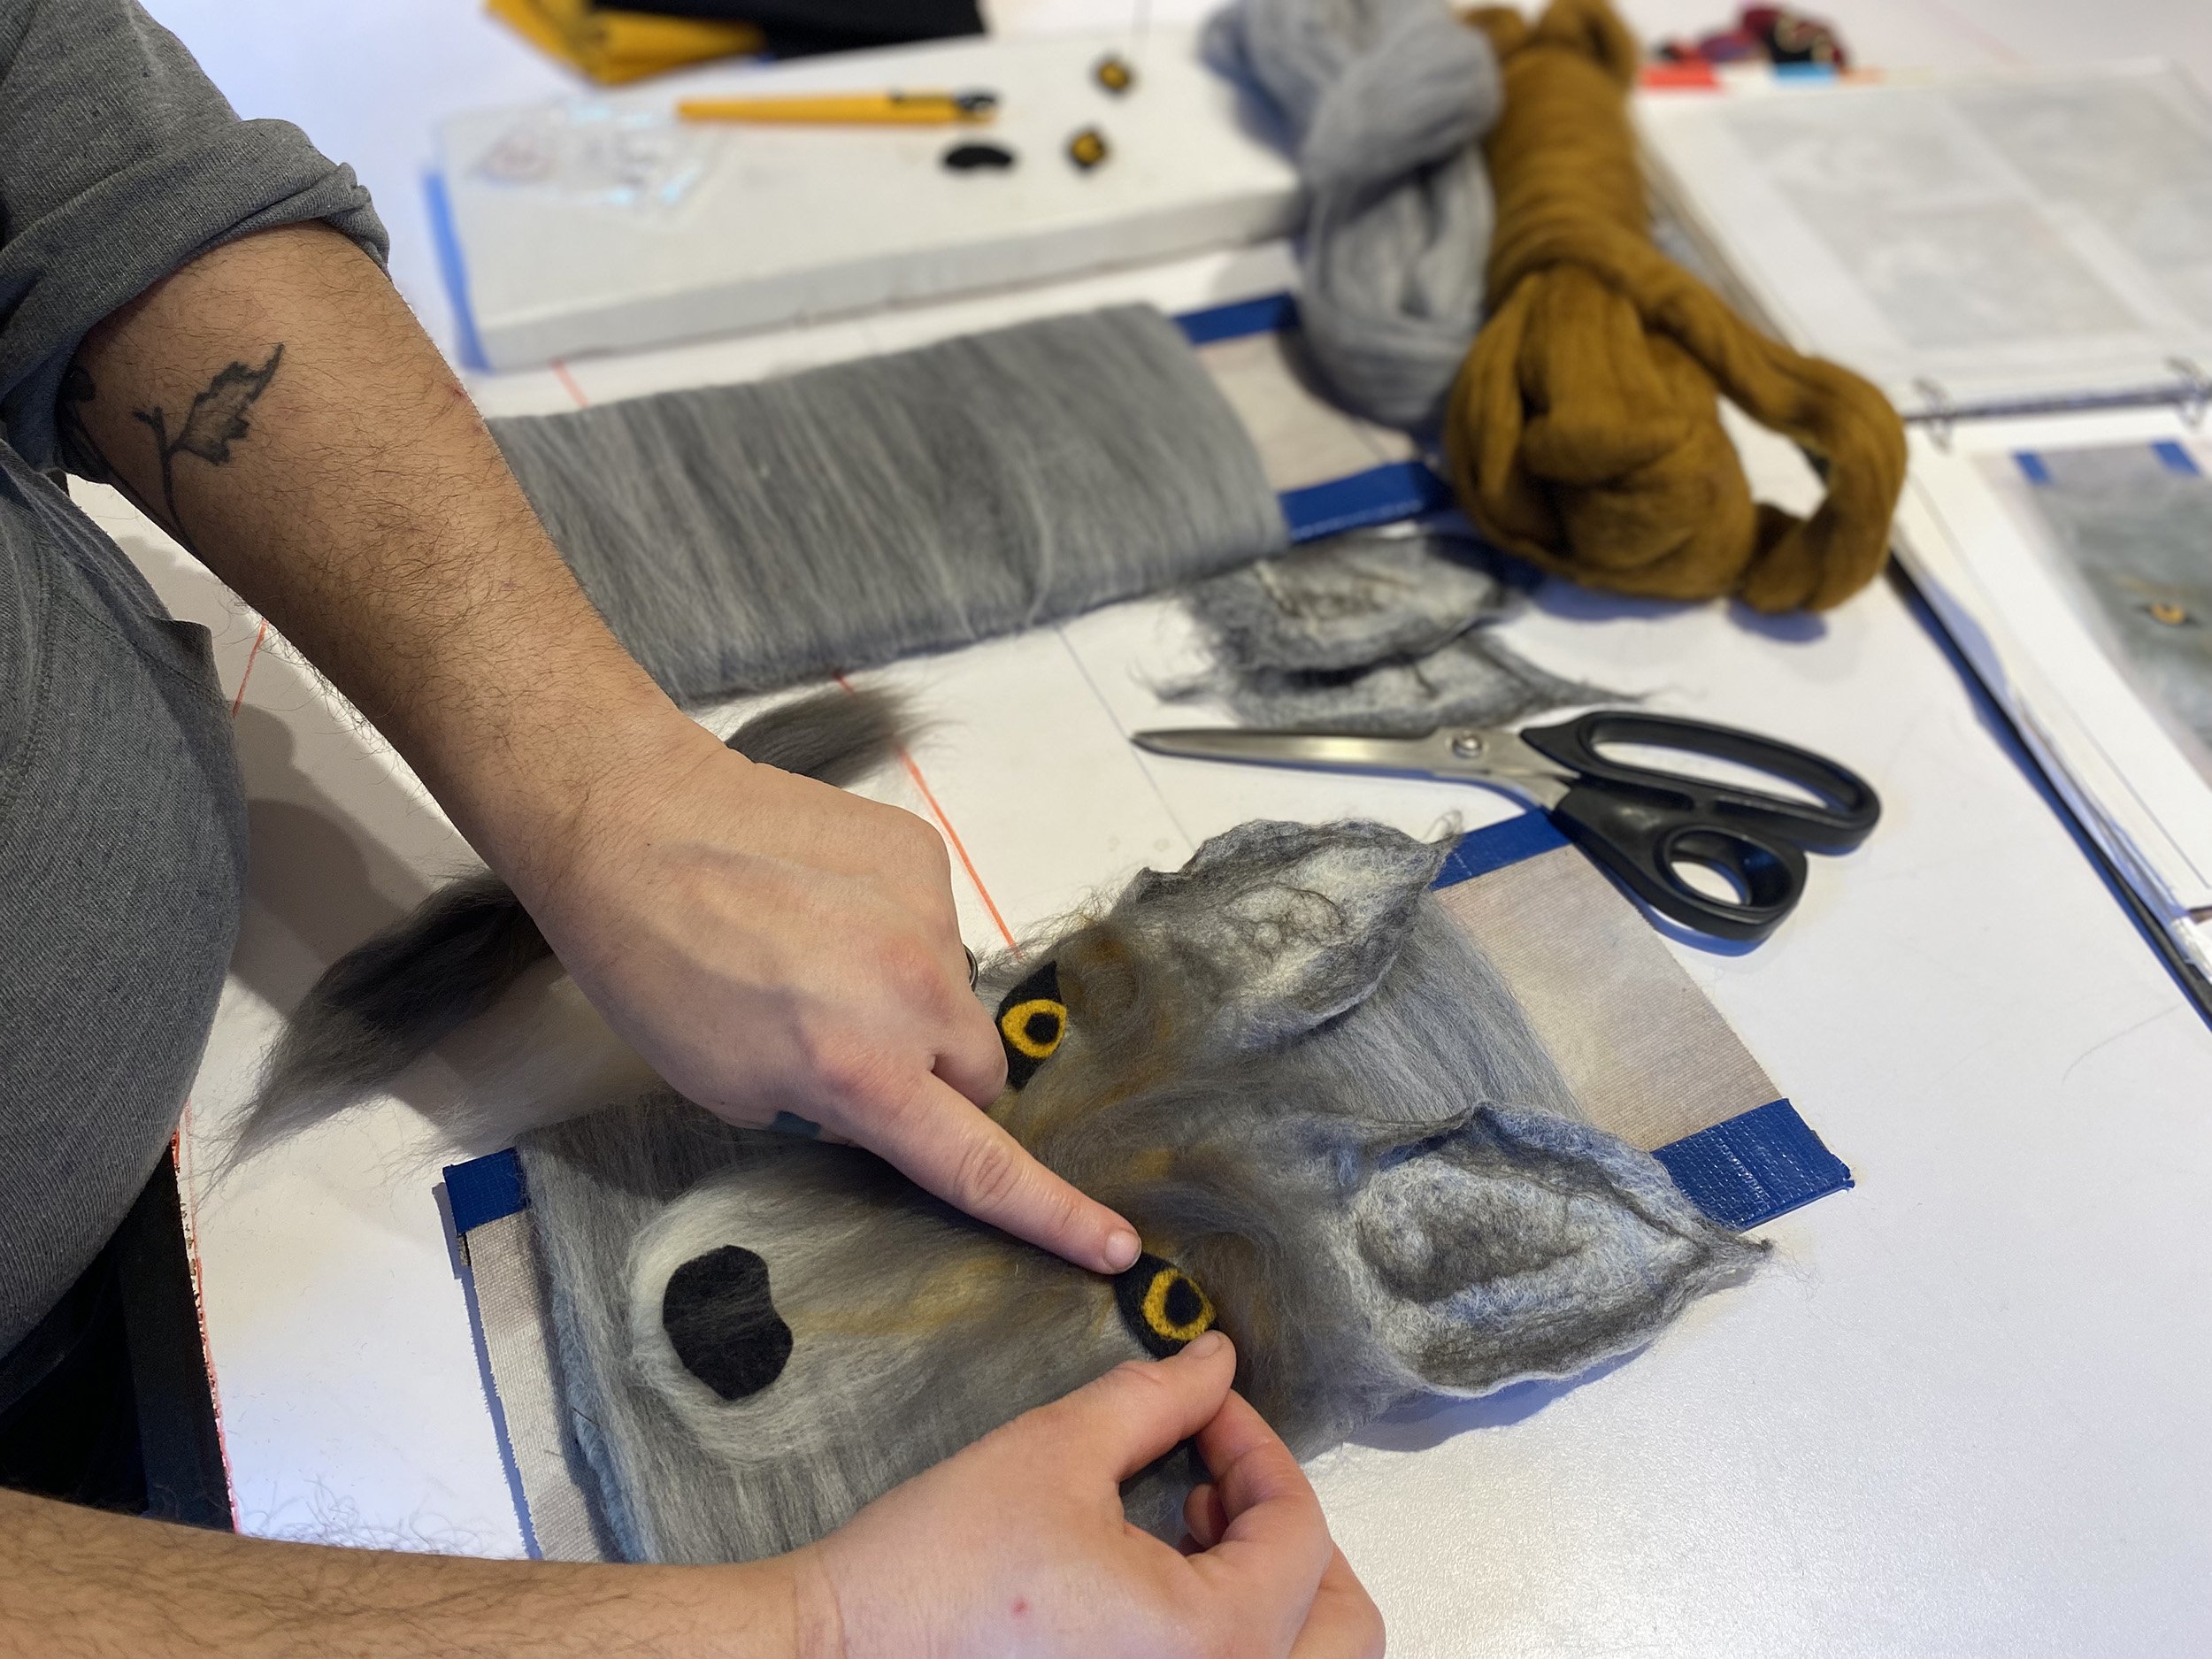
All of my designs are made from Merino wool roving. Roving are the fibers that have been sheered from the coat of a Merino sheep, washed, dyed and combed.
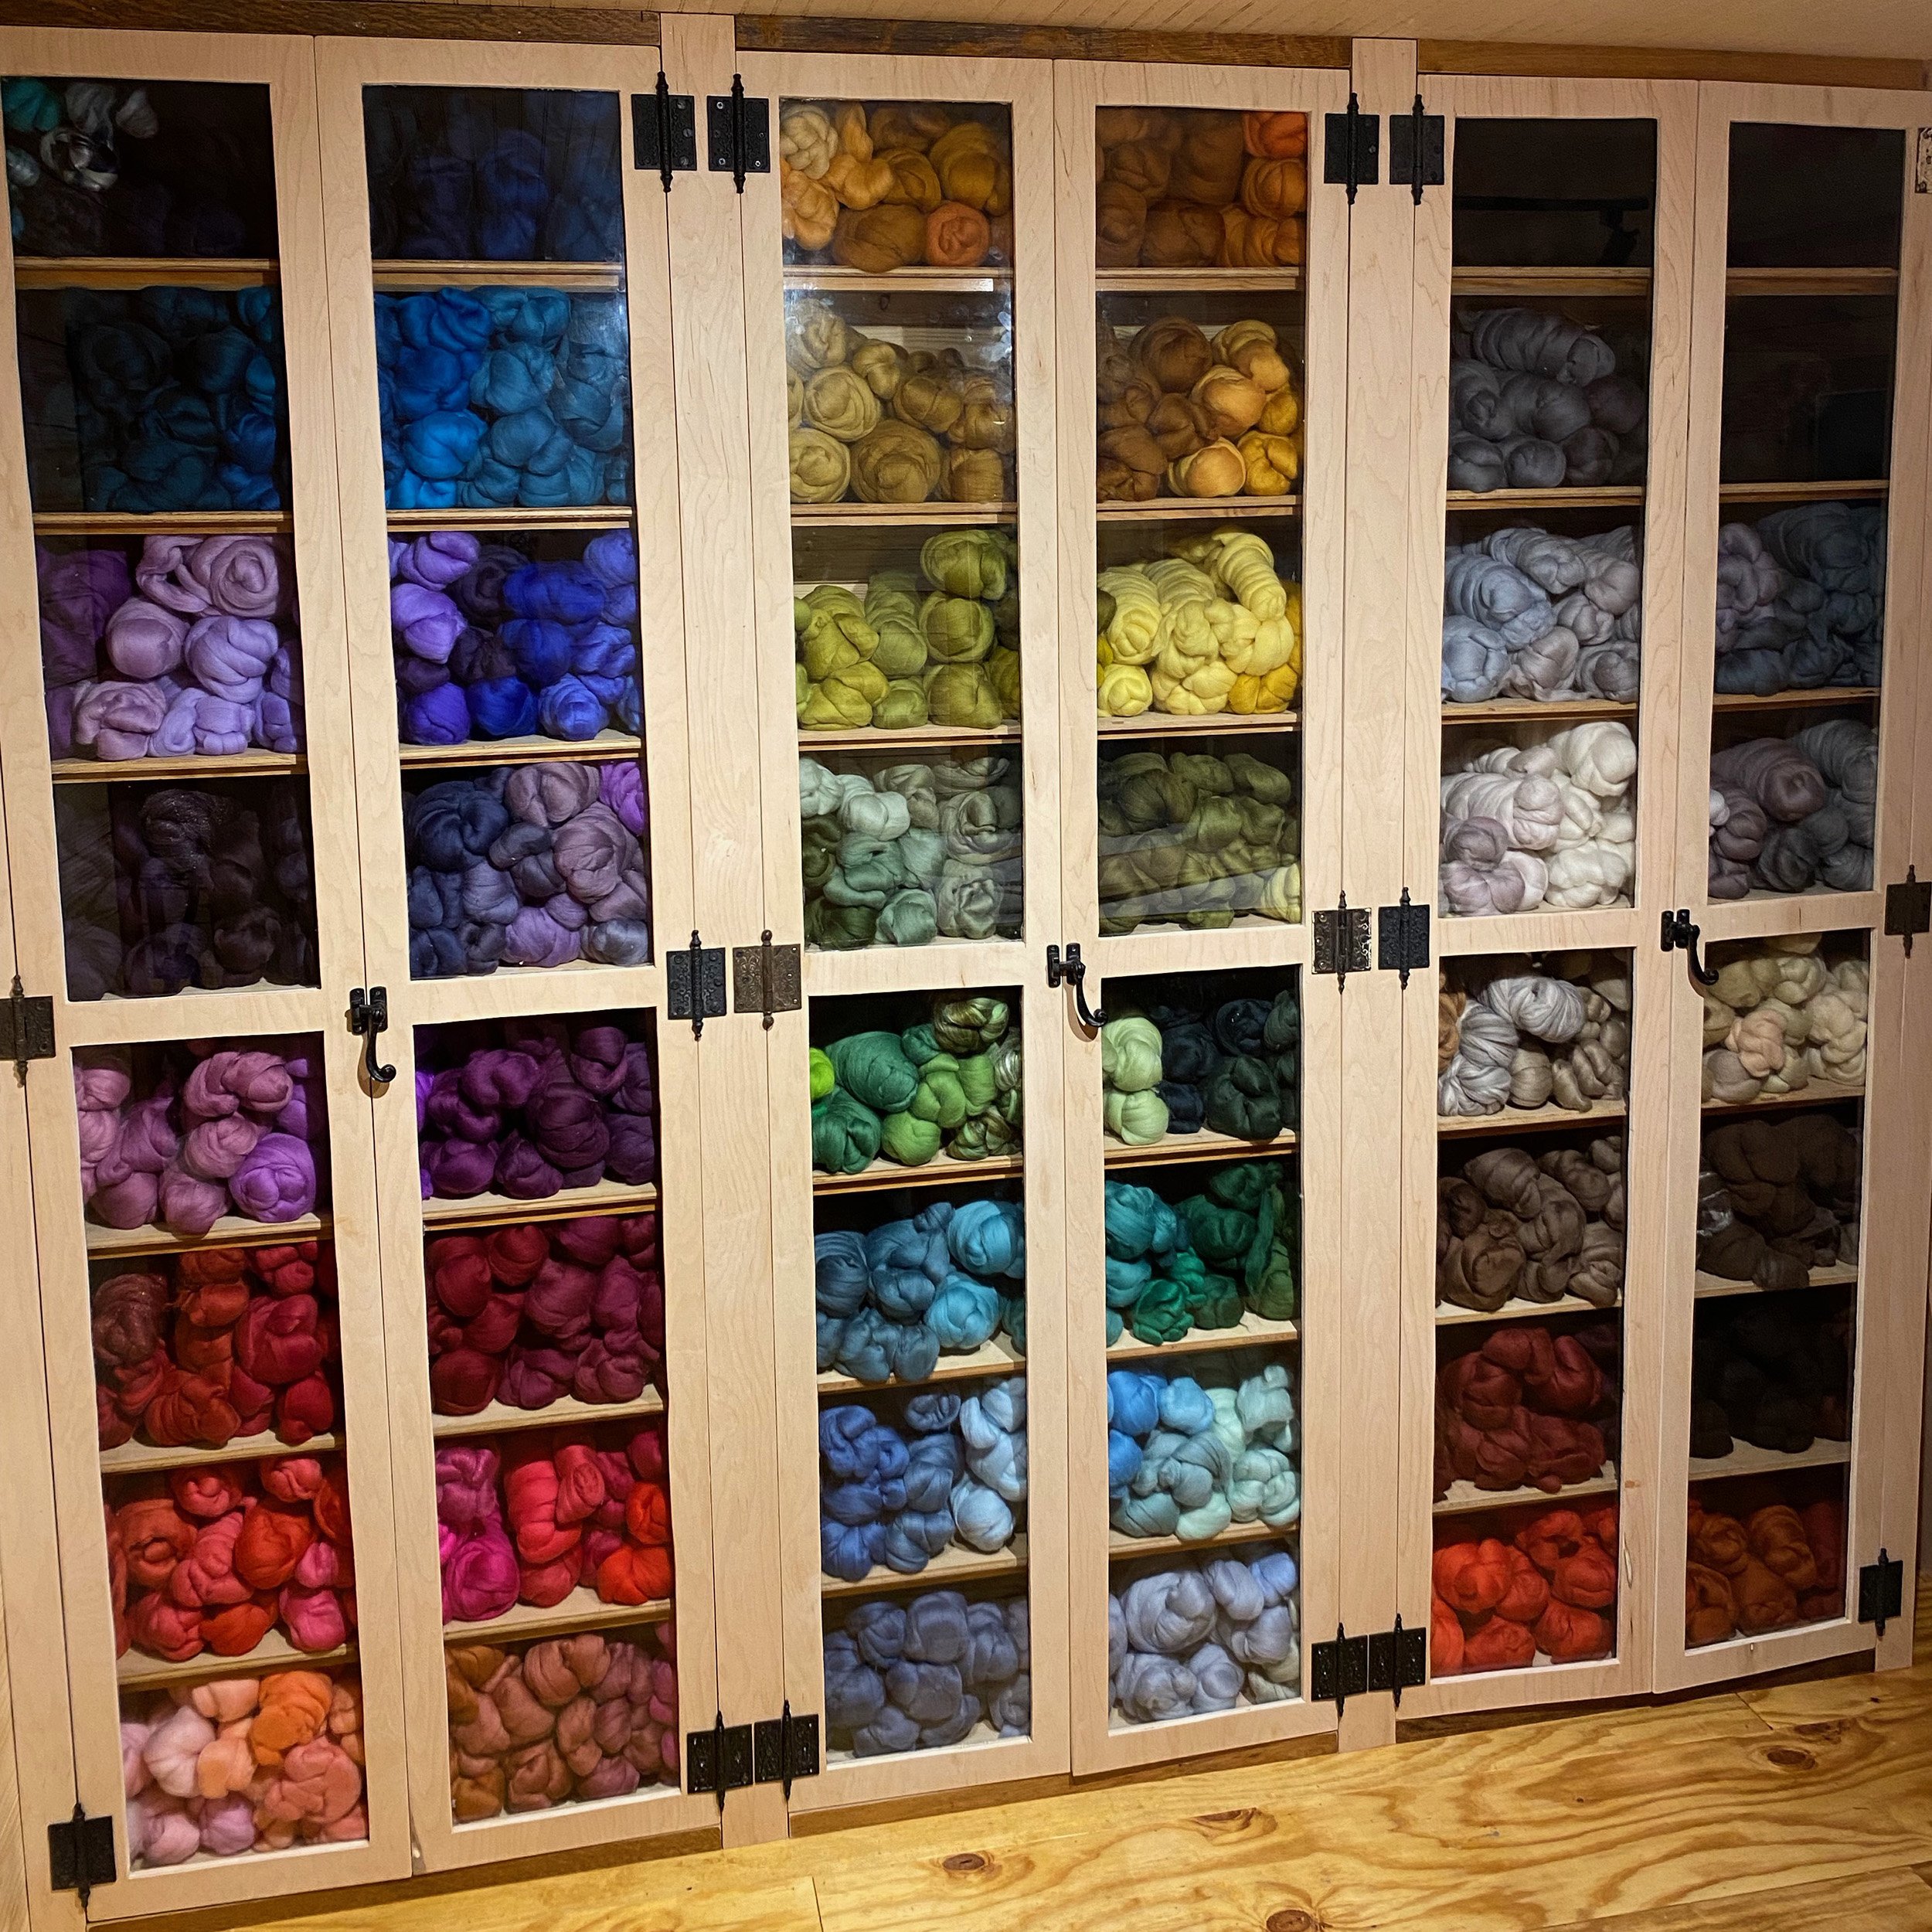
Because we’re mostly doing production work rather than strictly one of a kind pieces, I buy my roving already dyed so that my colors stay as consistent as possible. I’m a color freak so I can never limit myself when it comes to ordering wool colors. I have over 200 colors of wool in my arsenal at this point.


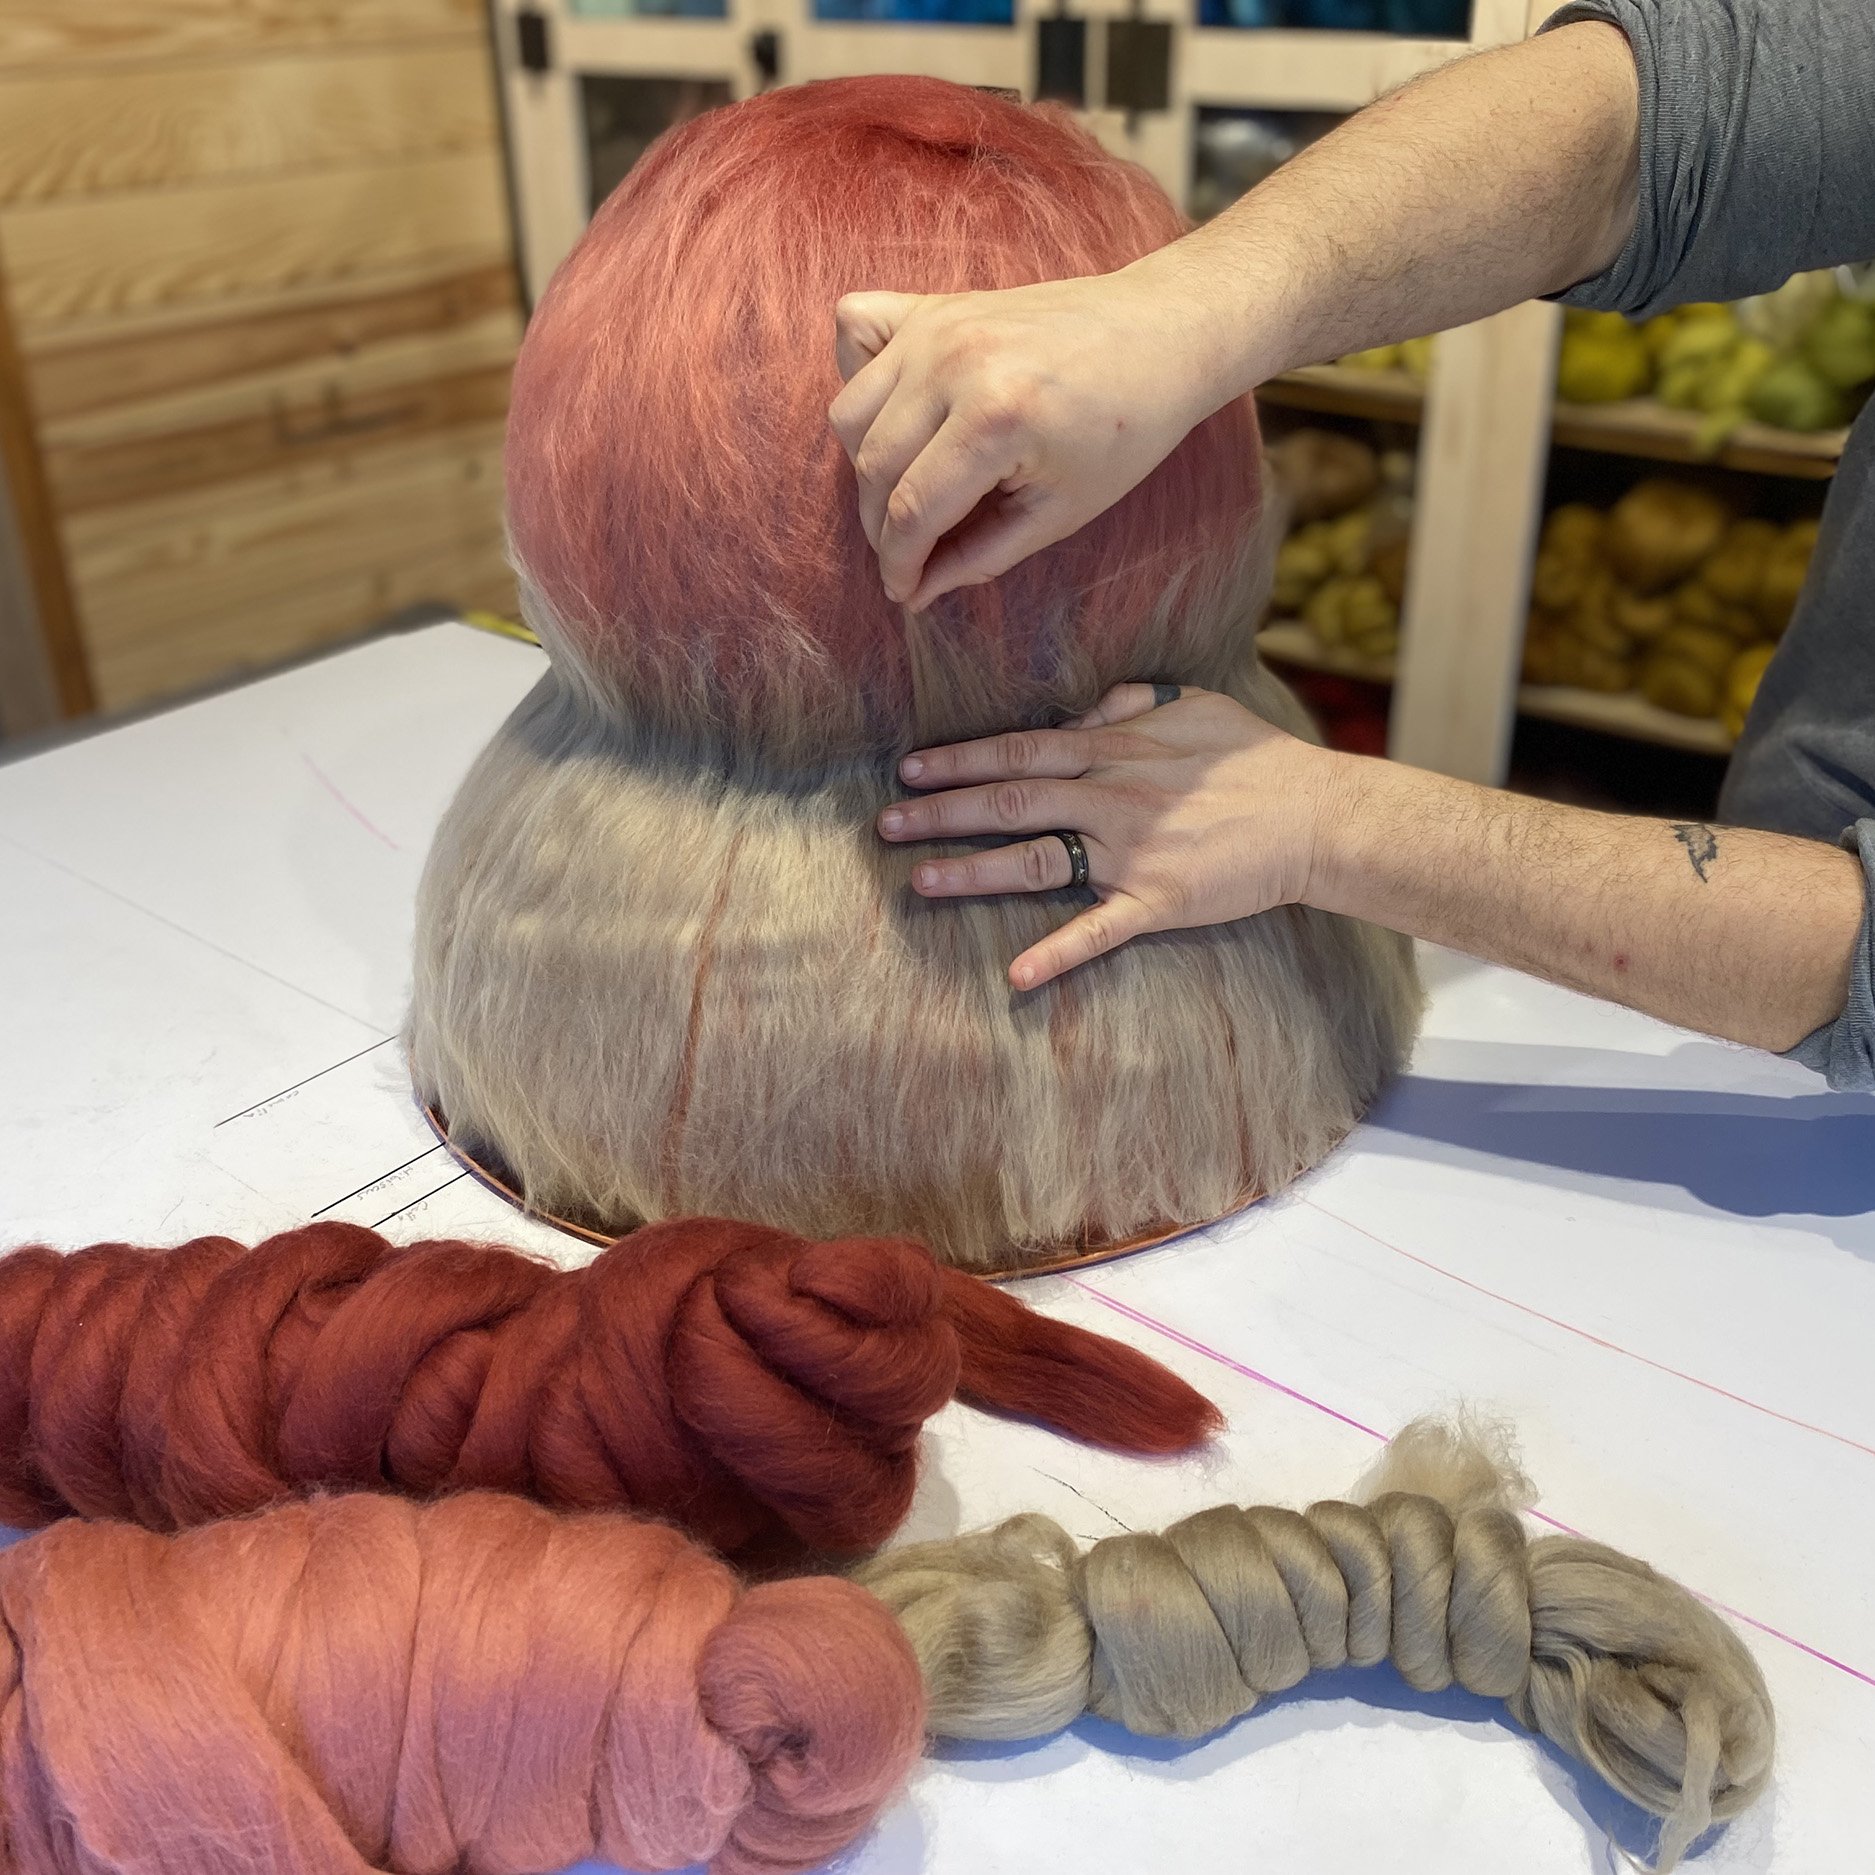
At least two layers of roving laid over different 3D resists depending on what I’m making. This is where the painterly effect of my designs comes into play because I can layer colors and shapes in almost any way I want (with a couple of caveats, but more on that later). The roving shrinks an average of 40% during the felting process so we have to start super big.

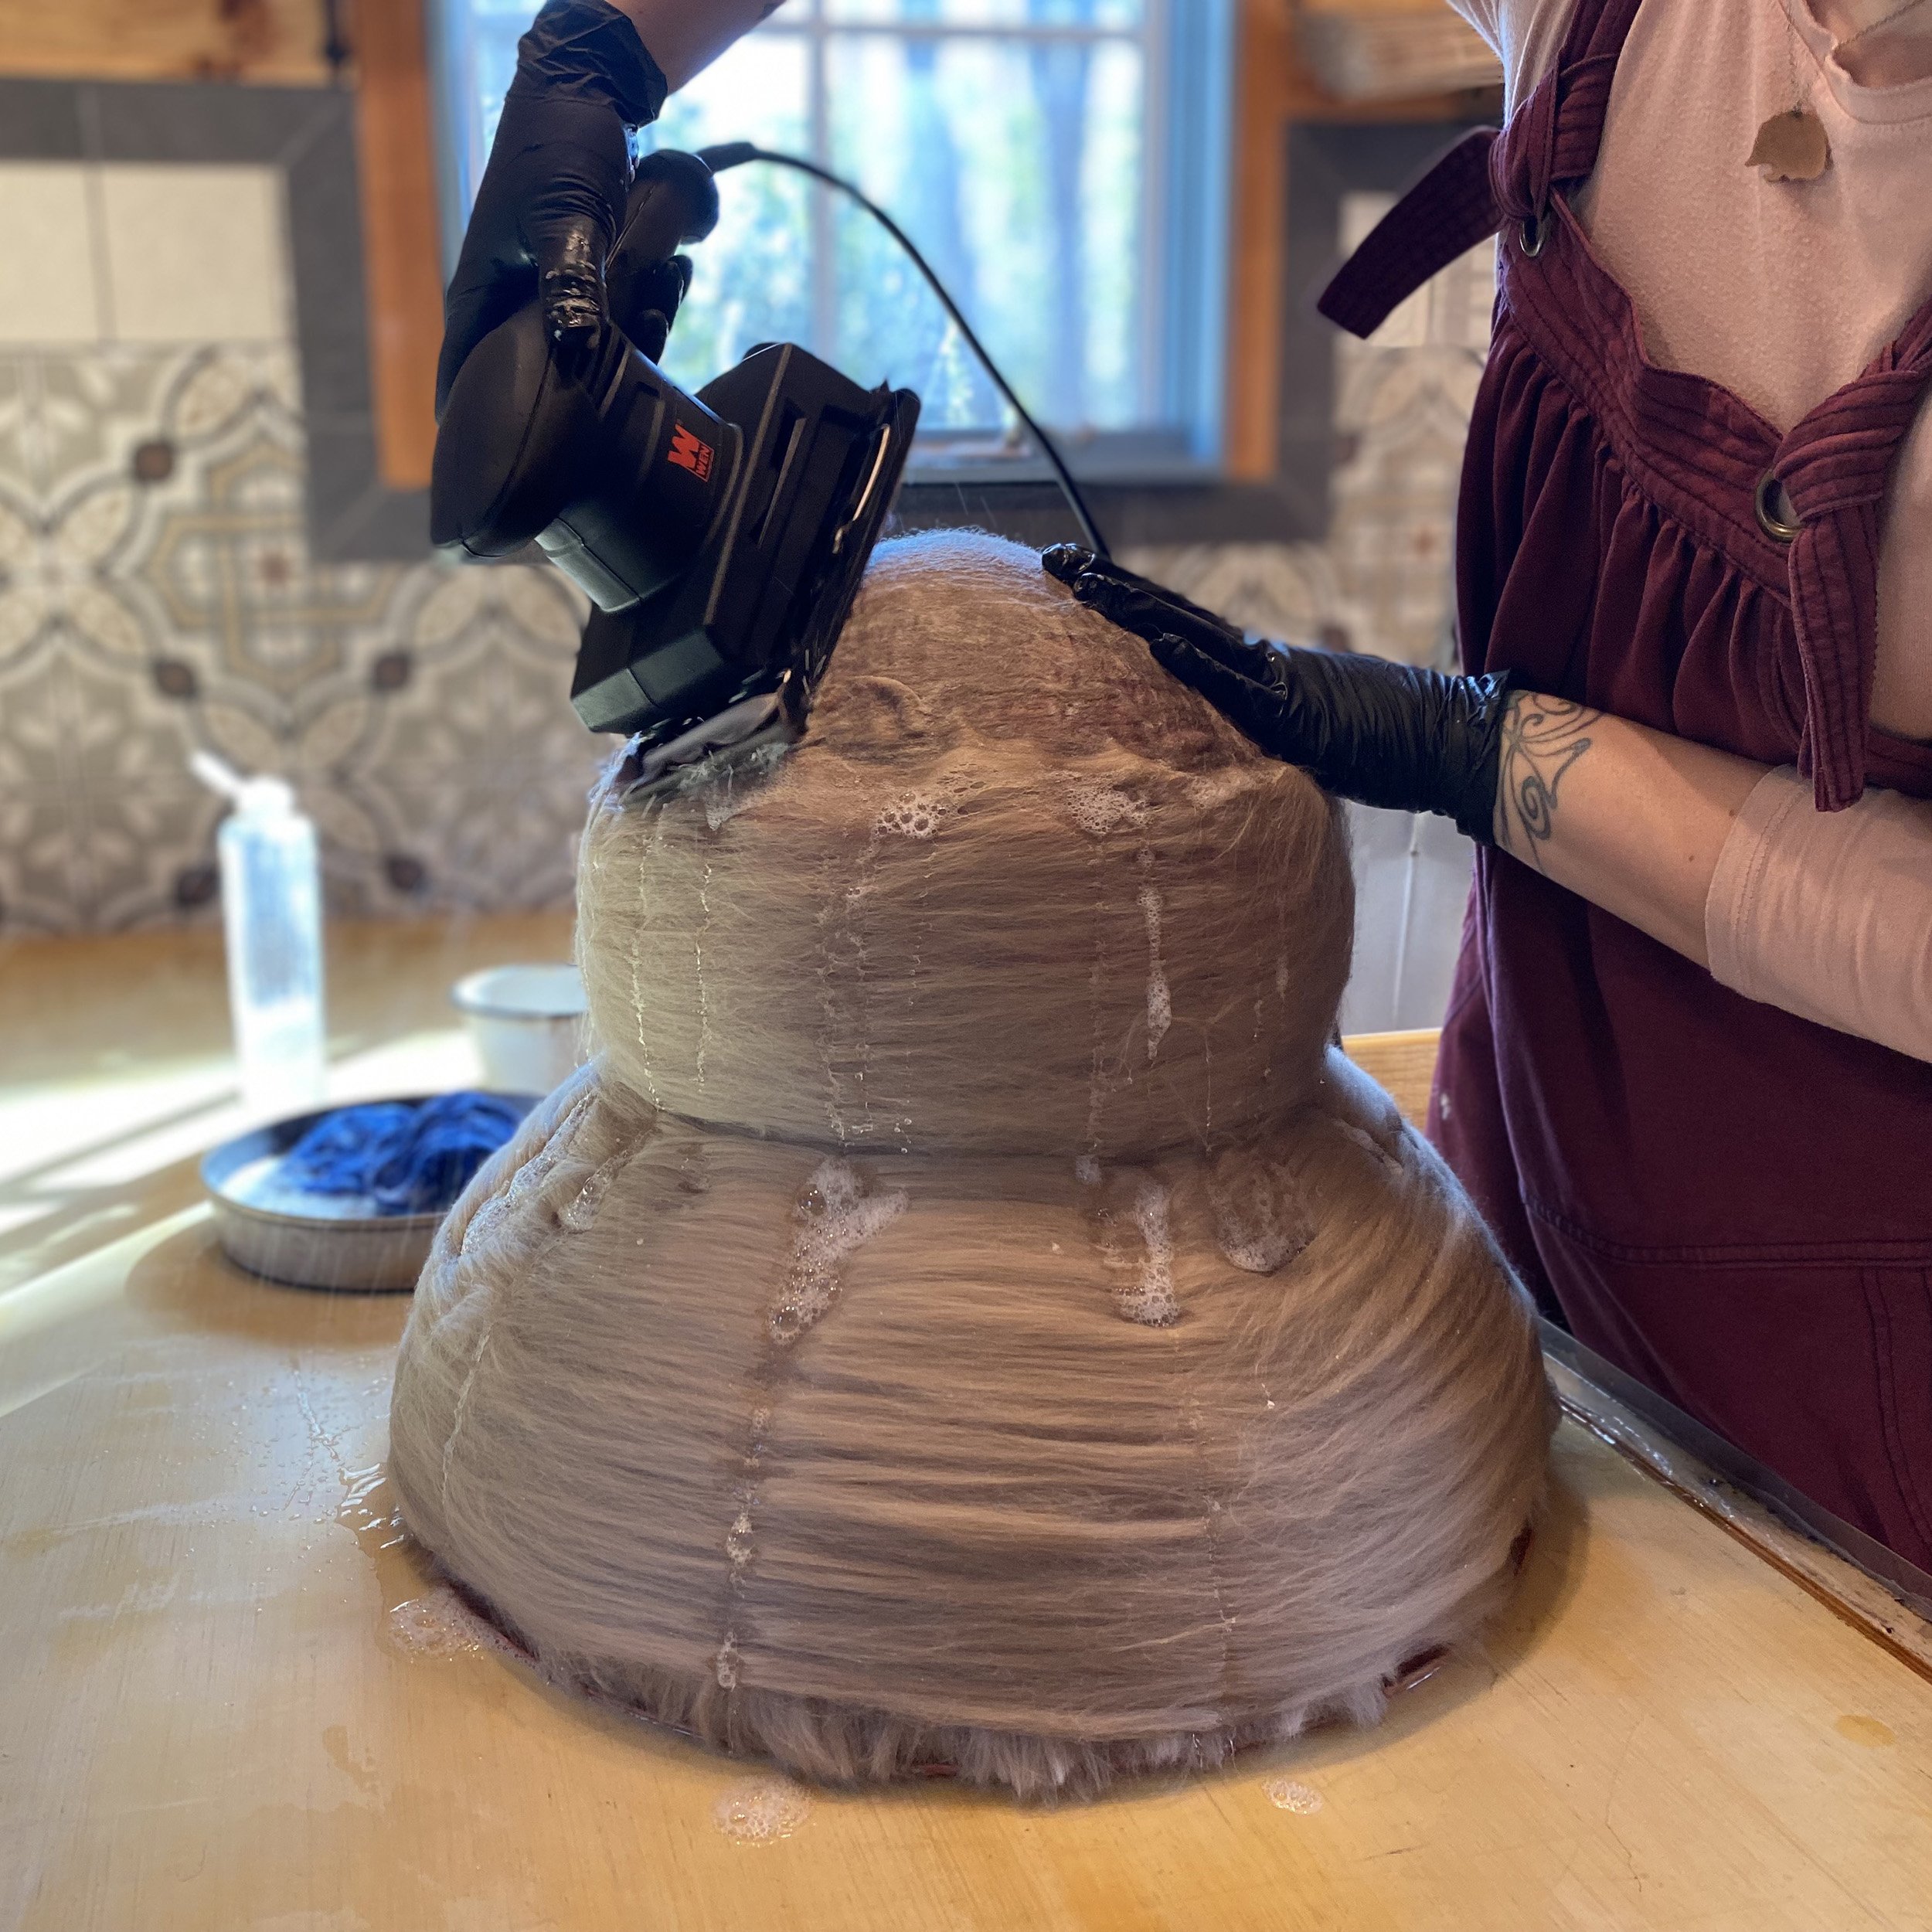
Next, the item is wet down with hot soapy water and partially felted inside and out using a power sander with a piece of vinyl on it (where the sandpaper usually goes). At this point, depending on what I’m making, I may let it dry and add a manipulation such as pin-tucks or a surface embellishment like a spider web. It’s also at this point I often attach a part that has been partially felted separately such as the wings on a dragon scarf. In these cases it will get sanded a second time, then it all goes into the washing machine with a bunch of rubber balls to finish the felting process. This step must be carefully timed and monitored for progress so things don’t get over or under-felted and end up too small or too big.


After things come out of the wash, hats get blocked and flat things get stretched and ironed then left to dry. Blocking the hats involves stretching them over wooden forms that are the shape of the final product. This step requires a fair amount of hand and upper body strength to stretch the felt over the form. Bespoke hat making has been inching closer to a lost art for decades, so there are only a handful of companies around the world that make the blocks now. Consequently many of the blocks I use are very old or come from Poland, France or the UK.

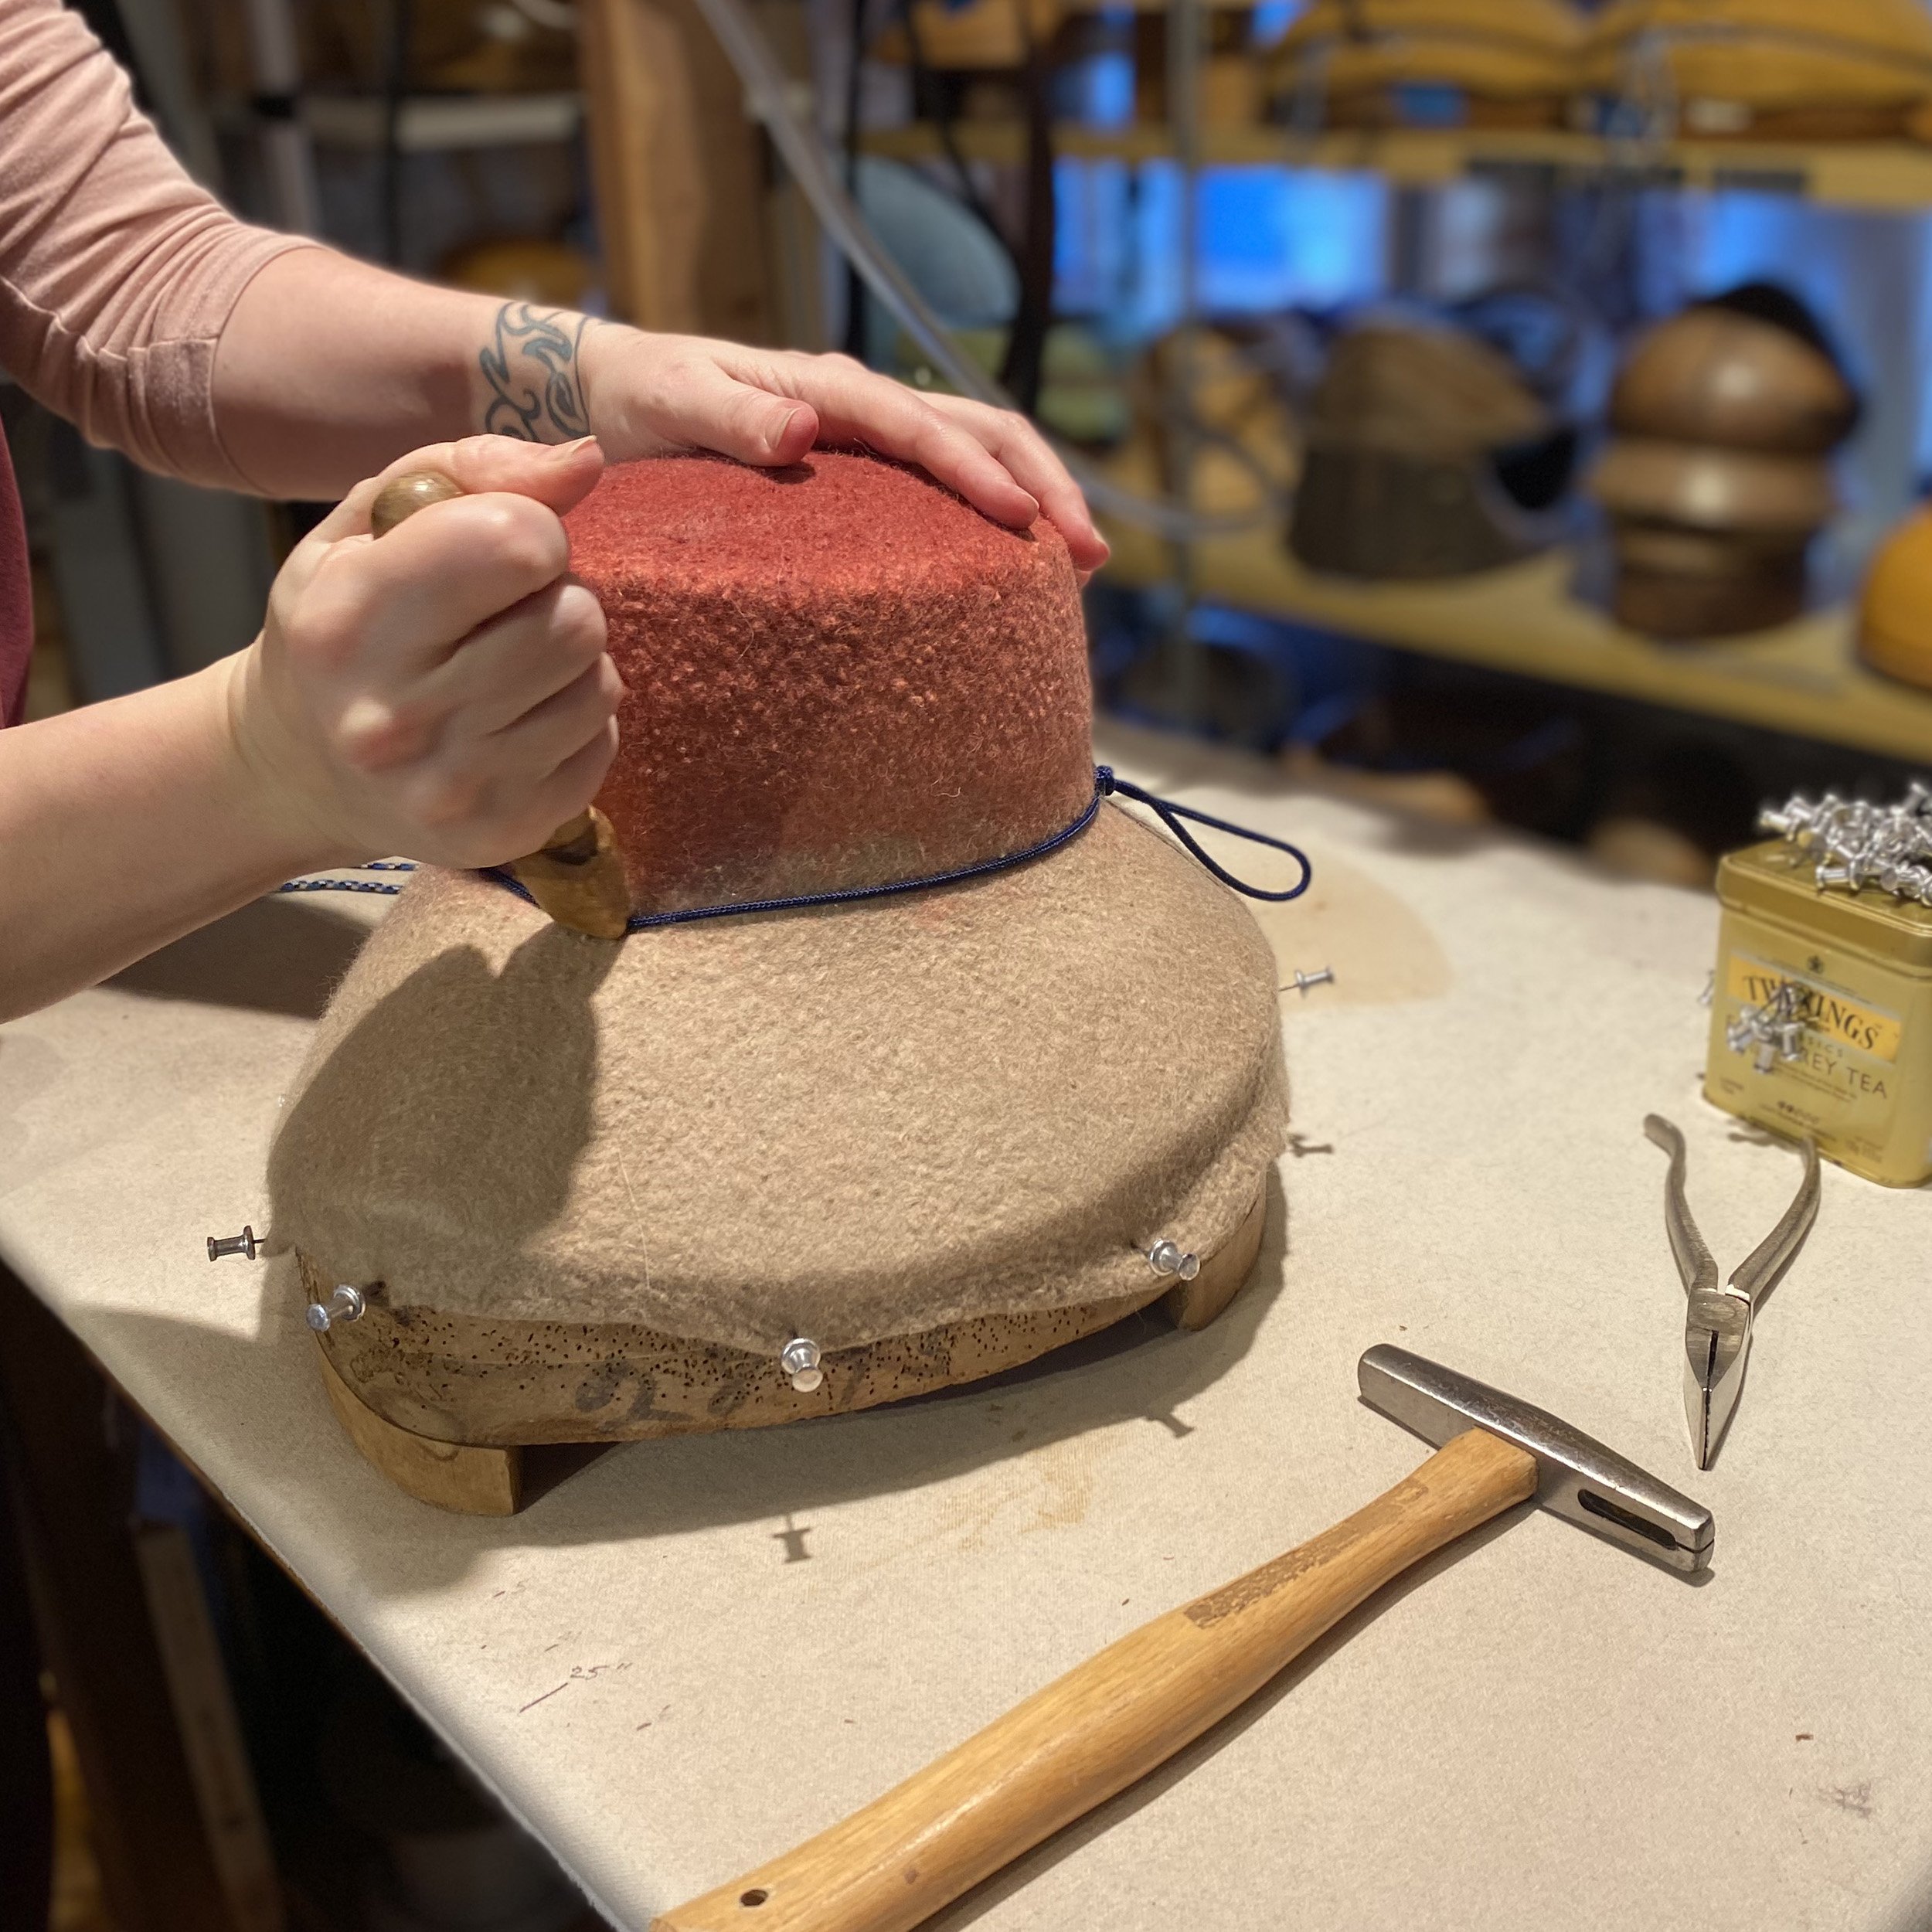

Once the hat is dry it’s taken off the block and any excess felt is trimmed away. If the hat is very tall (such as a witch or wizard) or needs to be more rigid to maintain a shaped detail (like a top hat or bowler), I may add a coating or two of stiffener called ‘sizing’ and let it dry again in my ventilated hat oven. Finally, the finishing work is done by adding a binding and hat wire to the brim, a band on the inside of the hat and any other detail such as a pin-tucks, buttons, feathers, ears or a crown band. The hat may get steamed one or two more times during this step.


